Lighting Neatly

I’ve wanted under cabinet lighting in the kitchen for quite a while. The one light in the centre of the kitchen means that while doing meal prep I cast a shadow onto my work area. Quite a pain.

The lighting I wanted needed to be plug-in, dimmable, and warm. I did some research and found some on Amazon, but I was concerned about return issues if they didn’t work out. At local hardware shops, the solutions seemed complicated and expensive.

Then I started reading about the IKEA smart home options. I liked what I was reading. While we were in Vancouver recently we stopped in and I got a change to see them first hand and I liked them even more.

I quickly gathered the information I needed and apexes out my lighting solution. Sue had to head to Vancouver for a work trip so I ordered online and she picked them up. Pretty easy so far.

Home installations as very easy too. A few screws and a few holes to run some wiring and it was done. The hardest part was actually the holes since my drill was too big to fit between some shelves. Once it was all working I had to buy some wire clips to neatly finish the job.

The “switch” is wireless was easy to pair with the lights, and is held to the wall using a magnet. Very cool.

Overall I’m extremely happy with how this project turned out.

Part Ego

Last week we had a guest coming, and the downstairs toilet was having issues with running. I took the offending flapper piece to Home Depot, but they didn’t carry the part. In fact it was a design that the guy working there had never seen before.


In an effor to get the toilet up and running again I bought one of those internal replacement kits. With about an hour of work and a few choice words due to all the corroded and rotten parts being hard to take apart, I’m proud to say that I fixed the toilet! I’ve noted here before that I am not a handy sort of guy, and that I do want to learn some of this stuff, so small victories like this are good for my ego.

Renovations Recipe

I’ve been interested in doing some small home renovations. Lack of knowledge, tools, and desire to use all my weekends all the time stop me from doing anything larger than a small project.

The downstairs was renovated recently, and the downstairs bathroom painted. Sue and I decided after the fact to replace the tap on the sink to something newer. The old one didn’t work all that well, leaked, and was going to get expensive when buying replacement parts.

We bought a new faucet at Home Depot and I set about replacing the old one. Here is what we started with.

IMG_5723 2.JPG

The first step is to take the old faucet off. Sure, no problem right?IMG_5724.JPG


One question, how do I fit a wranch in there? Easy answer is you don’t. Instead you take the sink off the wall (this sink is wall attached). Hitch number one can be seen above in the first picture. See all those little tiles that go right down to the edge of the sink? Well, they have to come off.


IMG_5727

One row off and the sink came off the wall easily.

IMG_5725


Of course, when puting the final assembly back together, I really didn’t want to glue those tiles back on, so instead I took all the tiles off. The glue used made a mess of the wall, so out I went to buy some spackle, and some other tools. I also bought some new hardware for the sink’s p-trap and water lines.

Turns out the water lines I bought were way too long. Returned those, got the proper ones, patched up the wall. Since we just had the bathroom and basement painted I went to grab the leftover paint to match up this area, but wouldn’t you know it, I couldn’t find the can. I guess the painter didn’t have any leftover.

Out to the hardware store where I bought the paint. They had to hand tint my 1 quart can since the color recipe was only for gallon cans. After a few issues with the p-trap, I got the whole thing assembled, cut to sit, resituated and voilá a new faucet.

IMG_6087


Only took 5 trips to the hardware store, and about 10 days/evenings of time. This is why I don’t tackle larger projects. 🙂

Weekend List

Another busy weekend gone, and I am tired, sitting on the couch thinking I should head to bed. First though, a blog post. Friday night I went out to a friends birthday parts at the Guild. Lots of fun, good drinks, lots of people I know, and great music.


Saturday I put up some shelving in Elliot’s room. This is something that has been on my list to do for a while now, and it felt good to get it crossed off.

After doing a bit of running around looking for bike rack supplies (more on that in a bit), Elliot and I went for a little ride at the dump. This was only the second time I had ever taken him there, so he was understandably tentative. He was getting off his bike at one point, slipped, and banged his knee on a rock, hard enough to draw blood. He continued on like a trooper though.

Saturday night was dinner at a friends place.


Sunday morning I was out for a long ride.


Sunday afternoon I set out to build a new bike rack. I saw some instructions on Lifehacker a while ago, and I wanted to build one. One run to Home Depot, a bit of mental figuring out, and voila! It works pretty sweet. For my road bike. It is too low for my mountain bike, but one I raise everything up three inches it will be perfect. Not bad for a weekend project.

I even had a helper for part of my project.

Impossible Bulbs

When we moved in our dining room had no chandelier. We bought one, had it installed, and were much happier. Then a bulb burnt out. Then another. Now it is impossible to find any dimmable incandescent bulbs. We tossed in a non-dimmable CFL and told the kids not to touch the dimmer, hoping that this would be fine.

On the weekend I was at Home Depot, so I decided to see about fixing the light properly. Turned out that to get some dimmable CFL’s, I would need to replace the dimmer switch, since I couldn’t remember what kind I bought last time. The lady I was talking to told me about the LED bulbs that were on sale. $15 off a $29.95 bulb until the end of November. Dimmable CFL bulbs were selling for $12.95. $2 extra for the LED. I figured why not, let’s give these a shot.

When I had some time I shut off the power to the chandelier, disassembled the existing switch, and installed the new switch. Being a non-handy guy, this was a big step. Then I took out the CFL, and installed one of the LED bulbs to see what they look like. Not bad. I put in the other 2 bulbs, cleaned up, and that was that.

Last night I was working on the dining room table, and I had the though, that I really liked the light quality from the LED bulbs. They are bright enough, but the light is a pretty warm yellow, not a harsh white like many CFL bulbs.

I am not sure what I will do when some of the other CFL bulbs start going and the sale isn’t anymore.

Flower Digging

Today cleaned up another old flower bed that was badly neglected from before we moved in. As I started to work I found that the small Holly bush that I wanted to remove used to be a large Holly tree that someone had hacked off. Lots of little Holly branches were growing from the remaining stump.

The only thing to do was start digging. What a hole I made.

A couple feet around it and about three feet deep. I couldn’t even get all the roots out either. I dug out what I could then cut the three roots that were a couple inches in diameter.

I was left with a big hole and big pile of dirt. The easy part was throwing the dirt back in the hole.

Caulk Clean

The other bits of today included some more house work. In the master bedroom I hung three more wall decorations, then I got to tackle a project in the bathroom that has been necessary for the past few weeks.

The caulk around the tub was in dire need of replacing. It was cracked a peeling in a few places, and very mildewed in a few more. It was looking extremely gross.

Last weekend at Home Depot I got all the stuff I needed, except time for the project. Hard to buy time for projects really. This morning I scraped off as much of the old caulk as I could, then slapped on some Silicone B Gone to clean up the rest. After getting back from getting our pumpkins I cleaned off the remaining caulk and caulk stripper.

After dinner tonight I was able to get in there an apply the new caulk. Sounds like a simple thing to do, and watching others do it sure looks easy, but I had no idea what I was doing. I didn’t know how much to put on, nor did I know how to properly apply it. A quick google search and I had a few tips to use (like fill the tub first), and a few to not follow due to lack of supplies (masking tape for clean edges).

I managed to make a bit of a mess, but I got the tub re-caulked. Not as cleanly as I would like since I used waaaaay too much caulk and had to take a lot off. It looks way better without the mildew and yellow caulk though. Now we just have to let it dry/set/cure.

Weekend Shopping

My fathers day weekend was extremely fun and gratifying. Sox and the kids were away in Vancouver, so this was my chance to tackle and conquer a couple construction projects that have been on my list a very long time. We needed to organize the downstairs area a bit (bikes, riding gear, tools, dog supplies, and more), and we needed a way to keep children from falling down stairs, or climbing up stairs.

I did some planning ahead of time, and had a basic plan drawn up of what I wanted to build, and how I would build it. We had an old shelving system kicking around and it was really bugging me that we weren’t making use of it. I suddenly had an idea of how I could incorporate those shelves into the bike rack storage area. With a few more measurements I was off to Home Depot to do some shopping.

First up, I needed a circular saw. After talking with a salesman I picked one out and was happy to learn there was a 15% off sale on certain brands. Without the power tool, I wouldn’t have been able to get the projects done in the time I had. I also picked up some clamps (godsend devices), some screws, and the materials to make some sawhorses. I grabbed the 2X4’s and 2X6’s I needed and loaded everything into the truck. At this point I was feeling pretty good about how things were going.

I dismantled the existing shelving int he basement, cleared a good size work area, set up a sawing area, measured again, and started chopping. I was a little nervous on the first couple cuts, but once they were out of the way it was smooth sailing.

The clamps more than made up for their price as I was hanging the structure of my rack, and trying to get it vertical. Hanging the cross member 2X6 would have been impossible by myself had it not been for the clamps. I loved the clamps! Once the bike rack was done I moved on constructing what I could on the child gate. With all the construction done I cleaned up the basement and put things away in their new homes. The amount of open space in our basement now is incredible.

I was feeling pretty good about how things went so I decided to tackle another couple projects. I found some moulding tucked away in the corner. I fashioned a couple blocks to put between some windows so they couldn’t be opened from the outside (the window locks are broken), and I decided to build a shelf in the crawlspace to make extra storage that was off the ground. This shelf required another trip to Home Depot for more lumber.

The crawlspace shelf was an easy build, but was hard for me to get it into the crawlspace on my own. The shelf 8 feet long by 32 inches wide and the crawl space is three feet high. With that in place I whipped up some legs, attached those and called it done.

Here is the storage area before I cleaned it up. Not shown are a couple big boxes, and a messy recycling are. Bikes leaning against one another, car pod in the way. Inadequate shelving space.

Here are some after shots. Bikes hanging neatly. Car pod has its own space out of the way.

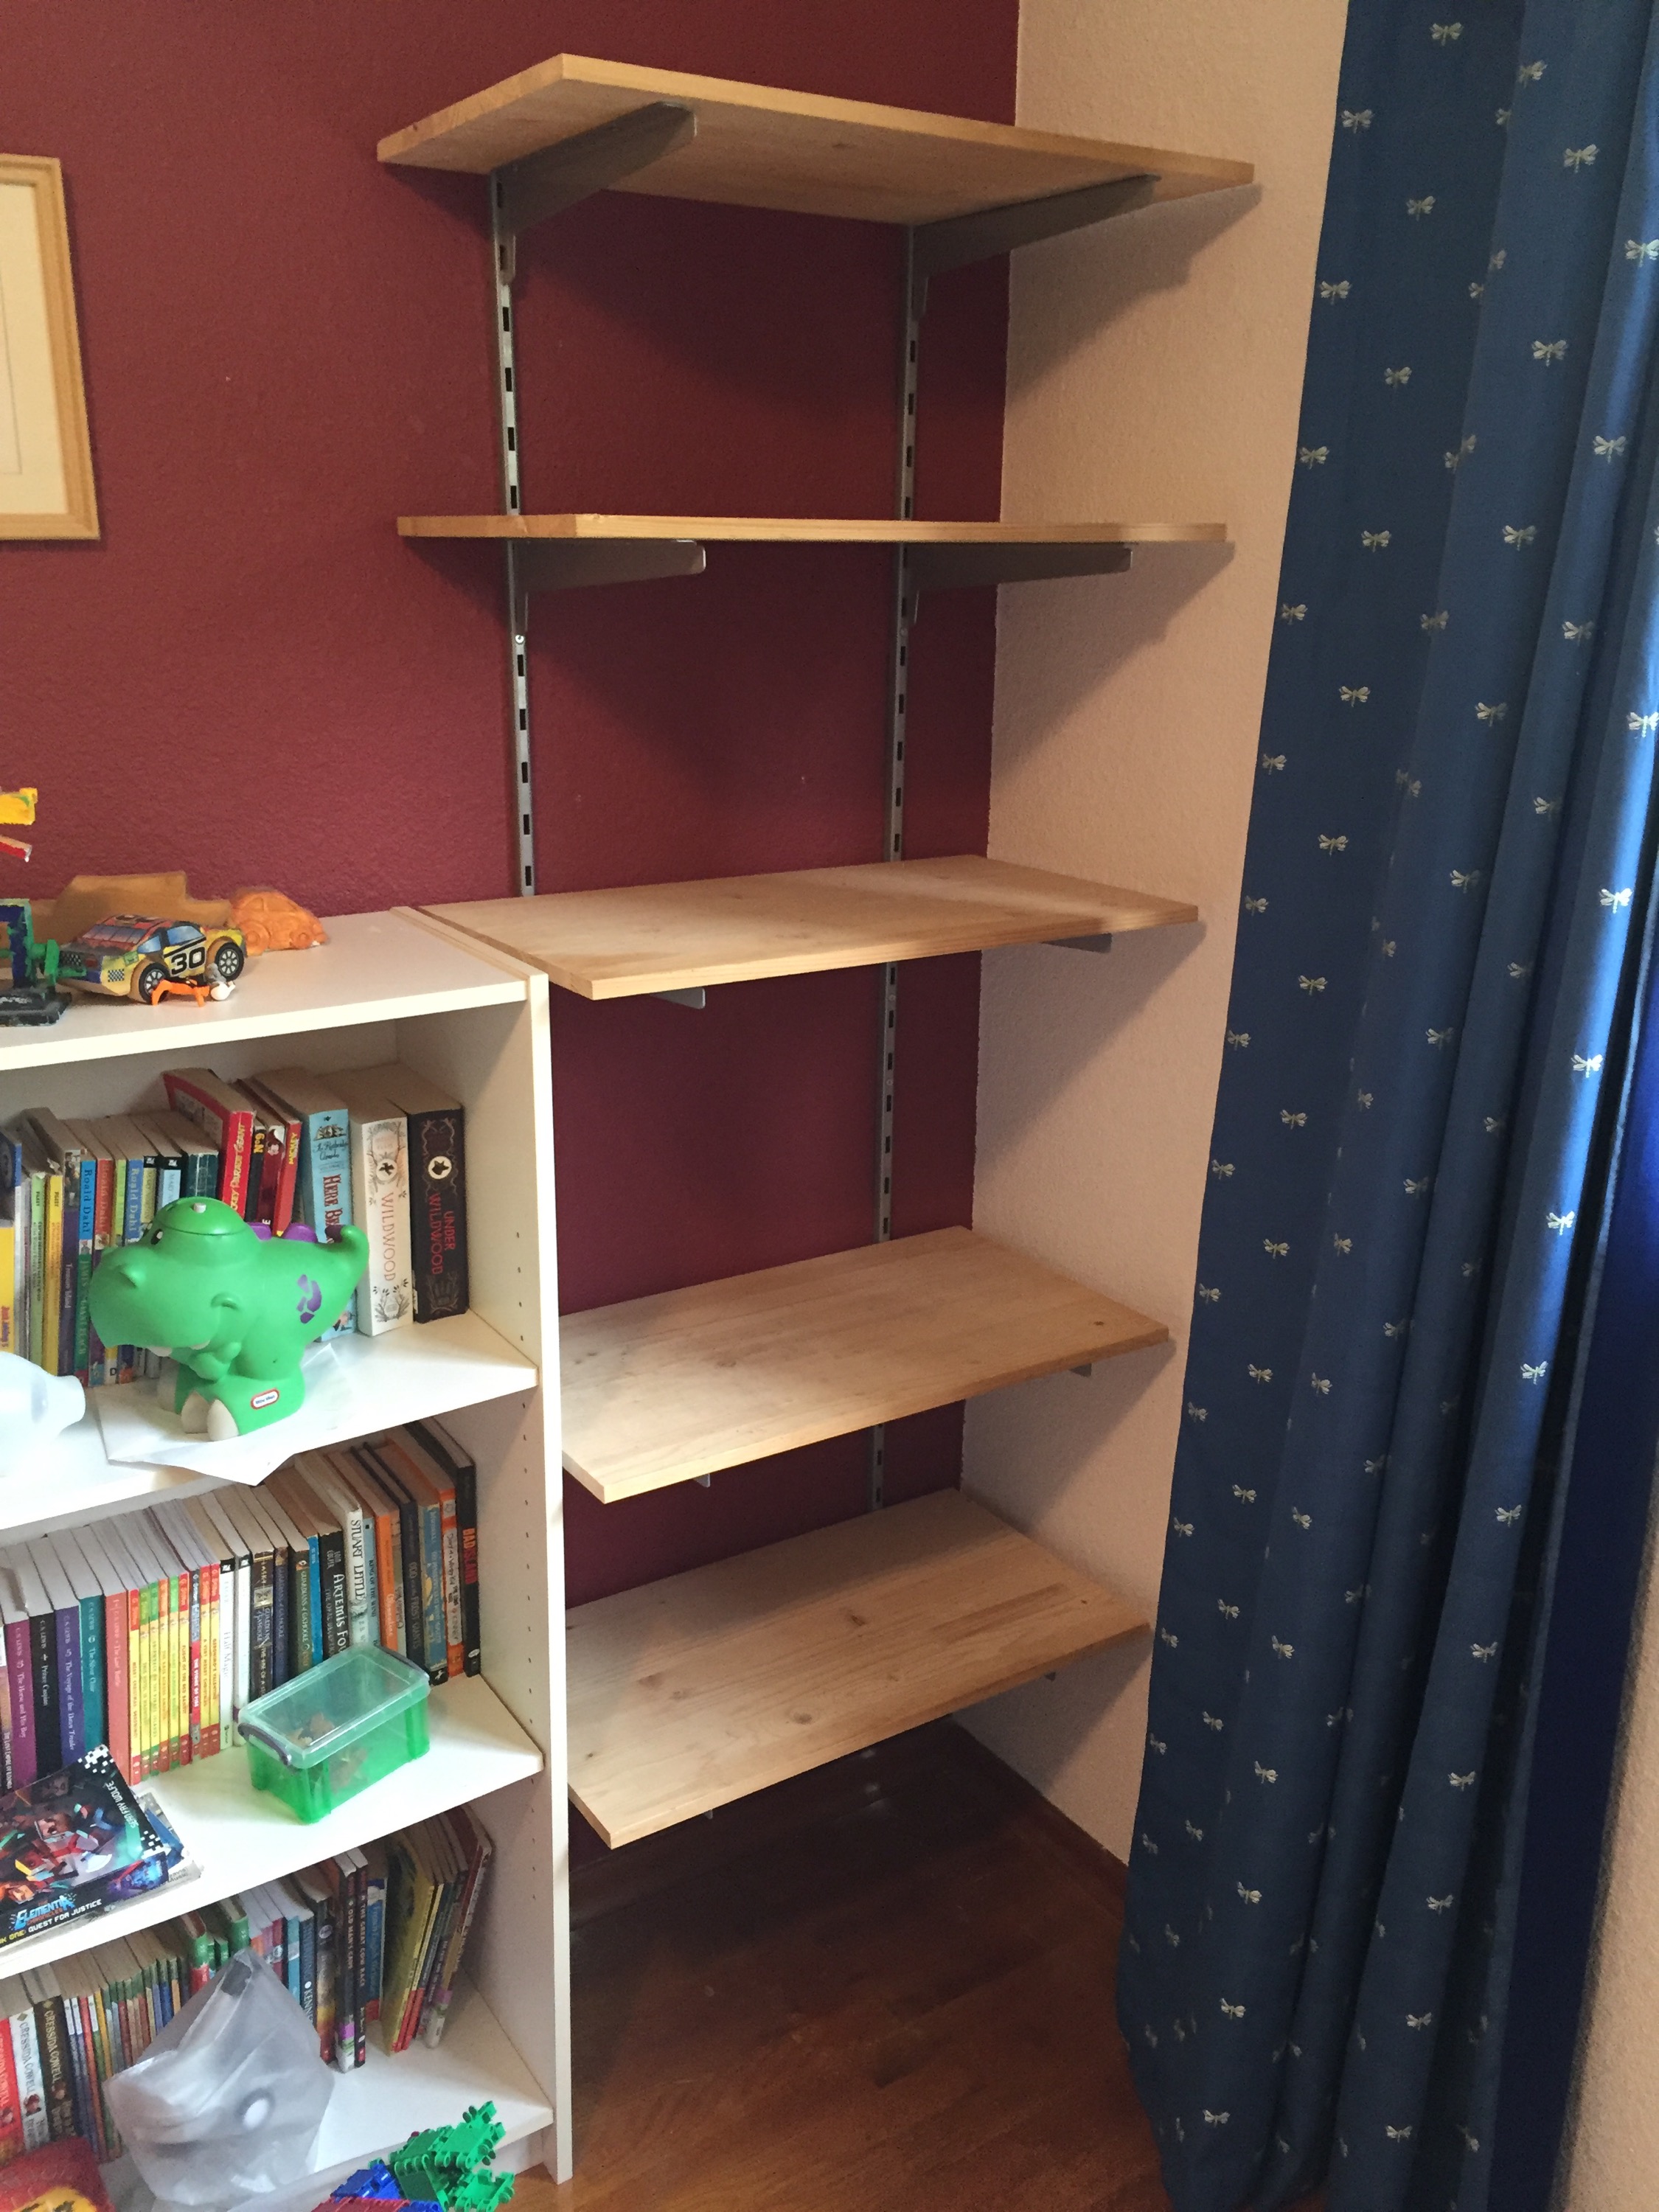
Usable shelving with places to keep things out of the way of children.

This is the shelf in the crawl space. This is a pretty bad picture of it, but it helps a lot with storage.

The thing I love about a weekend full of sweat and hard work, is the feeling of accomplishment when you are done. Being able to step back and say “I built that” feels great. I get pleasure every time I step into the basement now.

Detectors Linked

After we moved into our new house, we had an electrician come by and wire in some smoke detectors. The one in the basement is a combo smoke/CO2 detector.

Yesterday we had an opportunity to test them in the most glorious manner. Sox was blow drying her hair, and I think some dust dislodged from inside the dryer, hit the heating coil and burned. The downstairs smoke detector went off and started beeping. Then I head it talking “Fire …. fire”. The next thing that happened was the upstairs one went off as well. The two detectors are linked together. Cool!

Unfortunately for Yoshi he hates loud noises. Unfortunately for me the front door was open and he bolted. When I next saw him he was heading down the sidewalk away from the house, two houses down.

Sand Sight

I finished off the sandbox yesterday. At 8 in the morning, as we were thinking about getting ready for swim lessons, Sue thought I should call the sand place and see what time they opened. They were already open, so I went and picked up a half yard of sand.

In the afternoon after assembling our new wheelbarrow, I hauled it from the truck and dumped it in the sand box. Success!

We were having some friends over for dinner that night, but before they arrived, Sprout was out playing and digging. After dinner my son, our friends two kids, and the neighbours daughter and her friend were all in the sandbox diggin and playing.

It was a glorious sight! All my worrying about a less than perfect sandbox flew away.

Here is the final construction pictures.